Pierre Renard
Cloud technologies addict. Pierre enjoys making awesome cloud-based solutions.
Monitor your Amazon ECS containers running on Fargate with Dynatrace

With the rise of serverless and container-based solutions, it is sometimes more difficult to troubleshoot problems. Indeed, only some metrics like the CPU consumption are available. In most cases, this is not enough and making troubleshooting a pain.
To help troubleshoot problems and monitor our applications, the industry relies on monitoring systems. Today, monitoring is a requirement that you cannot miss to operate your service. In this blog post, we will see how we can integrate a monitoring solution with our workload running on Amazon ECS Fargate.
Table of Contents
Dynatrace
Dynatrace is a software-intelligence monitoring platform that simplifies the monitoring of your applications, services and infrastructures. It provides features including:
- Real user monitoring;
- Mobile app monitoring;
- Server-side service monitoring;
- Network, process, and host monitoring;
- Cloud and virtual machine monitoring;
- Container monitoring;
- Root-cause analysis.
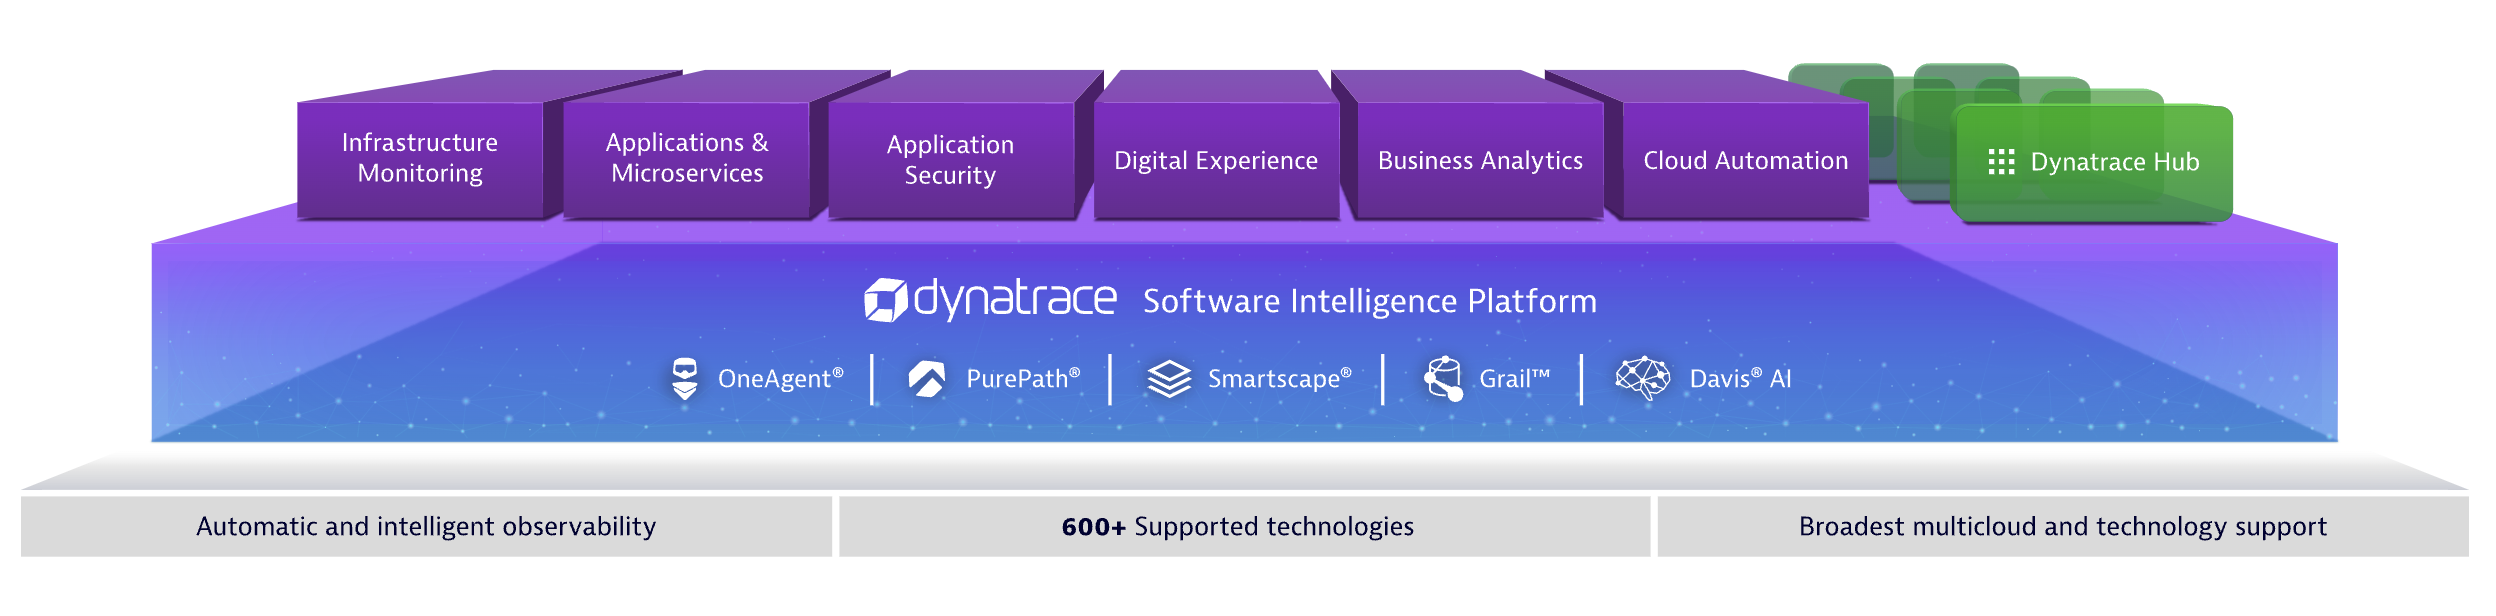
For more information about the Dynatrace, please visit What’s Dynatrace.
Dynatrace OneAgent
All monitoring data within your monitored area is gathered by OneAgent. Only one monitoring agent per host is necessary to gather all monitoring data. The agent can monitor Docker containers, microservices architectures, or cloud-based infrastructure.
The monitoring agent detects which processes run on each host and collects performance metrics for the most important processes. OneAgent can also perform more detailed monitoring of specific technologies (such as Java, Node.js, .NET, and others) by injecting itself into those processes and monitoring their performance from within. The agent also monitors web applications by injecting Javascript code in the application. No additional configuration is needed.
Dynatrace OneAgent Integration
There are several solutions to integrate the Dynatrace OneAgent in your Amazon ECS Cluster.
- Build-time injection: Build your Docker image with the monitoring agent included. This solution is not very flexible because if you have to change your current monitoring solution, then, you have to rebuild a container and rollout all containers. In most cases, we would choose the
runtime injection; - Runtime injection: Pulls the monitoring agent when the container starts. This approach can be implemented without touching the container by loading the monitoring library during the launch phase of the application’s container.
Overall, the runtime injection is more flexible because it decouple the installation, the configuration and the run of the Dynatrace OneAgent from the run of the application itself. Also, it allows more flexibility because you can change your monitoring solution without modifying the container build.
In the next section, we will explain how to integrate the agent with a proof of concept using the runtime injection.
Runtime integration proof of concept
In the scope of this proof of concept, we use a pre-configured ECS cluster already deployed. For more information about ECS cluster creation, please refer to Creating a cluster using the classic console from the Amazon user guide.
To deploy a container on ECS, you must create a task definition. A task definition is a JSON document which contains all information needed to run your container in the cluster like the docker image, the amount of CPU and memory allocated, data volumes and the IAM role used.
In the scope of our proof of concept, we will use the latest nginx application available on Docker Hub and monitor it with the Dynatrace OneAgent. To install the agent at runtime, you must deploy your application using a task definition with two container definitions.
- The first container is to download and unzip the monitoring agent to a shared volume
- The second container is for your application container
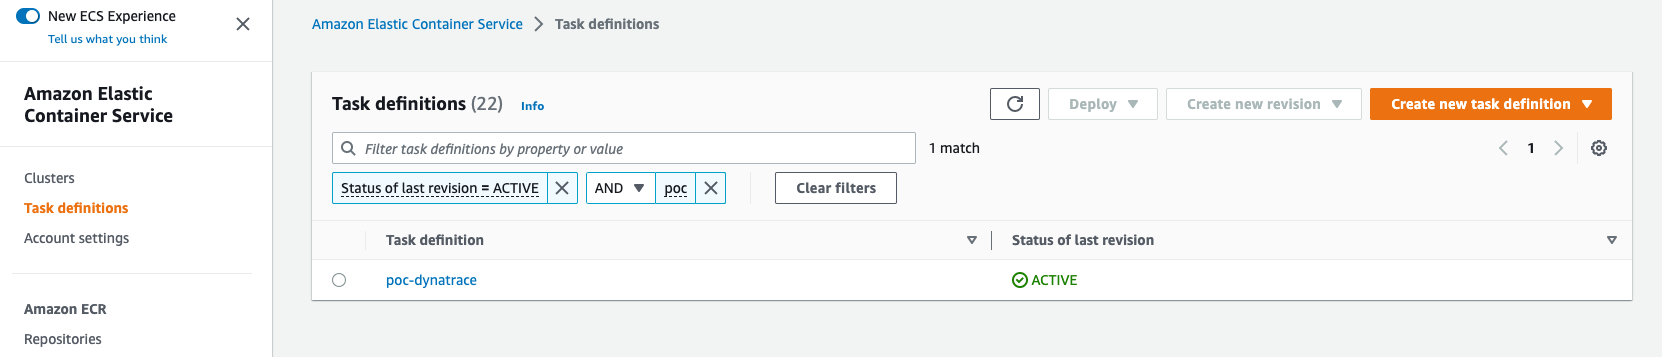
In the AWS console, go to the Amazon ECS service. Under Task definitions click on “Create a new task definition”
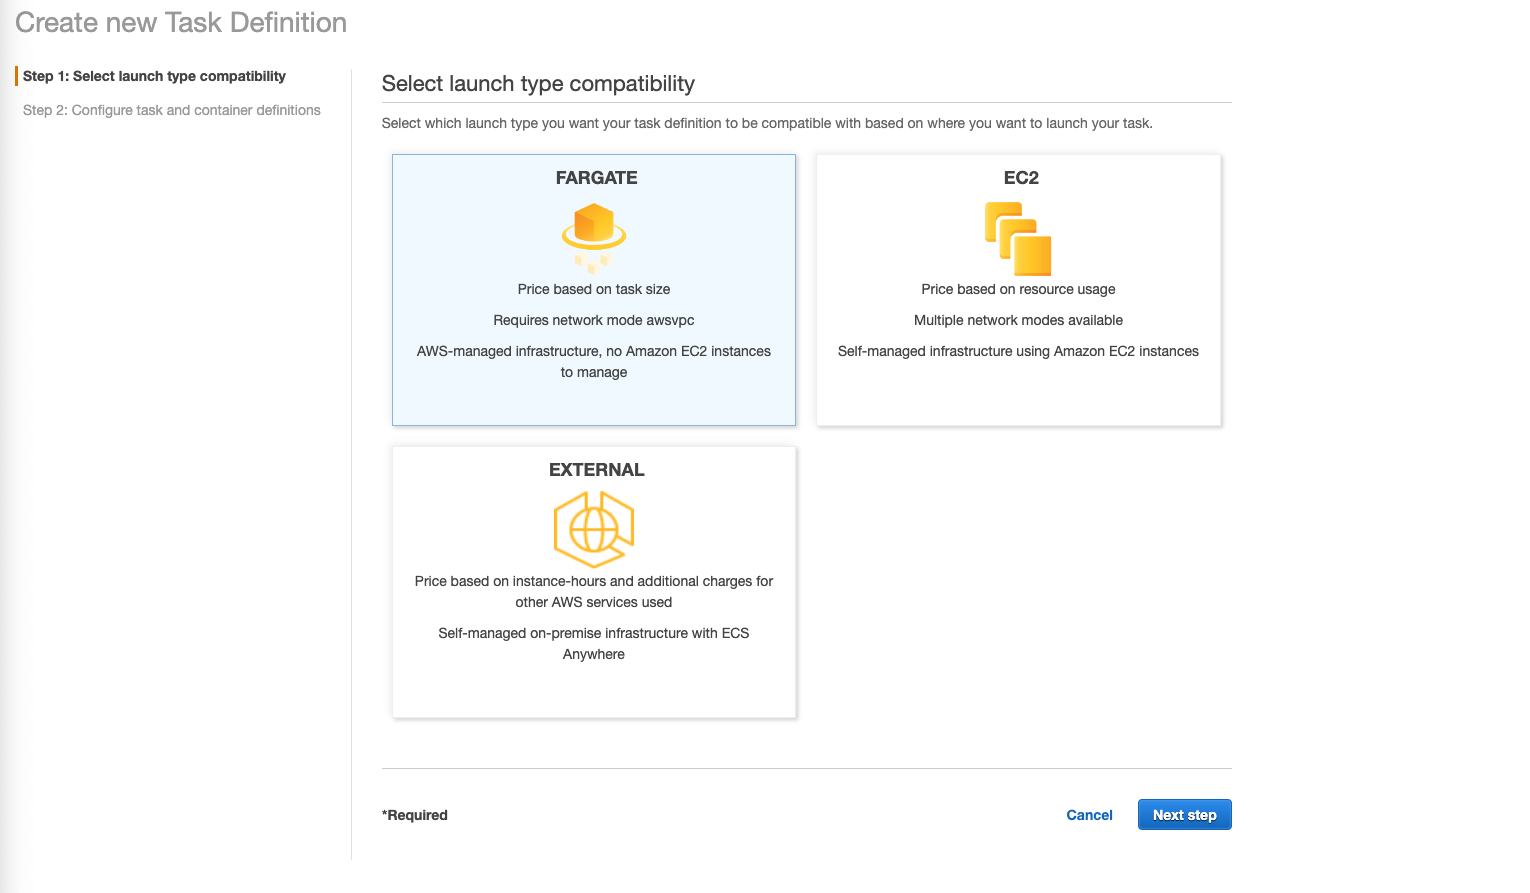
Select “Fargate” and click on “Next step”.
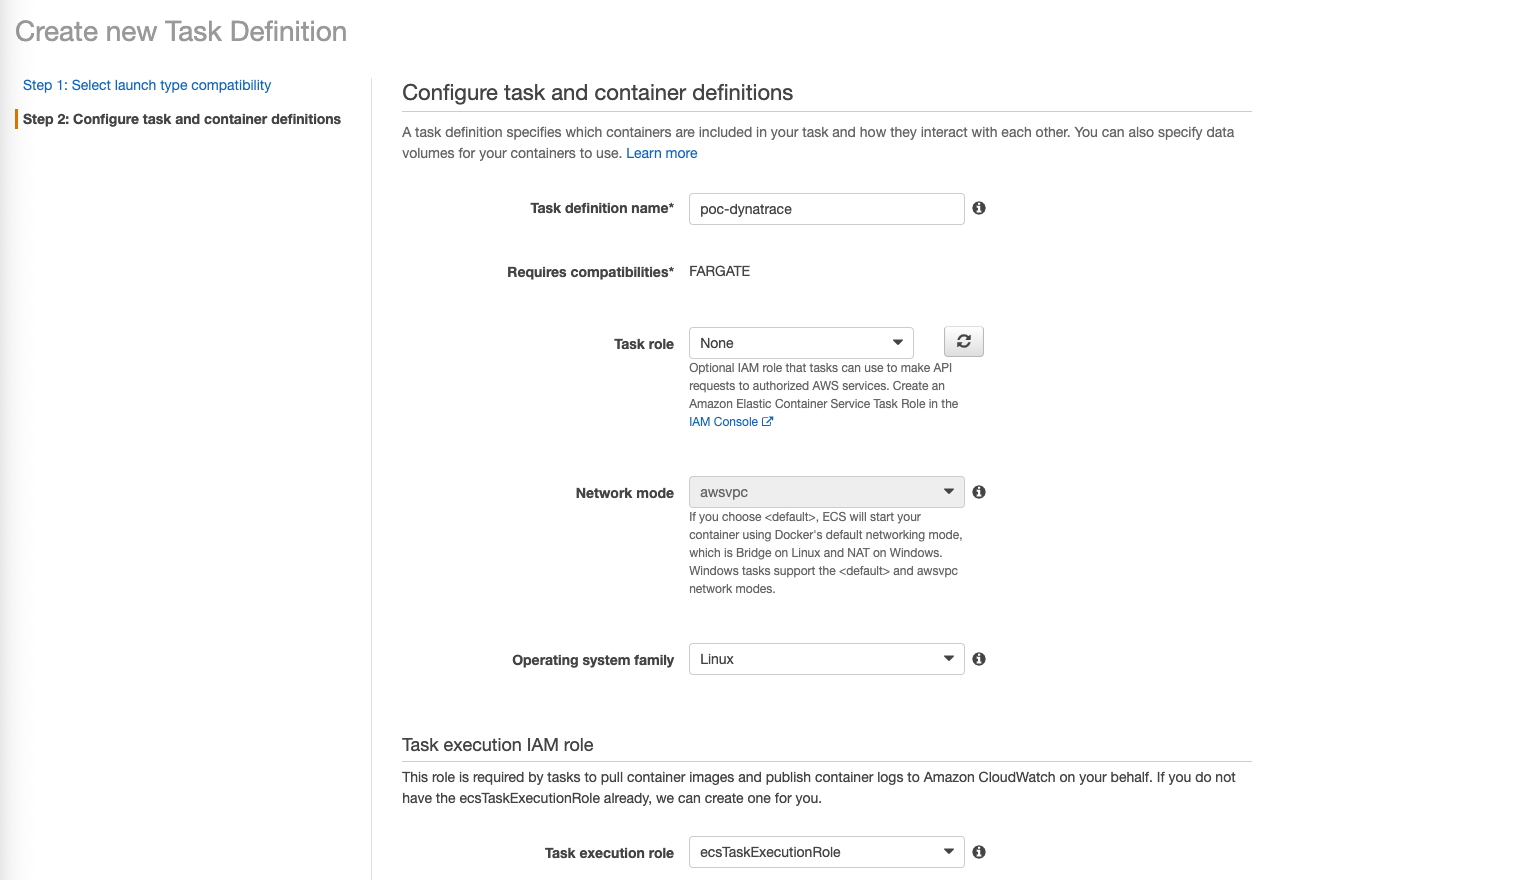
For the step “Configure task and container definitions”, enter:
- Task definition name:
poc-dynatrace - Task role:
None - Network mode:
awsvpc - Operating system family:
Linux - Task execution IAM role
- Task execution role:
ecsTaskExecutionRole
- Task execution role:
- Task size
- Task memory (GB):
3GB - Task CPU (vCPU):
0.5 vCPU
- Task memory (GB):
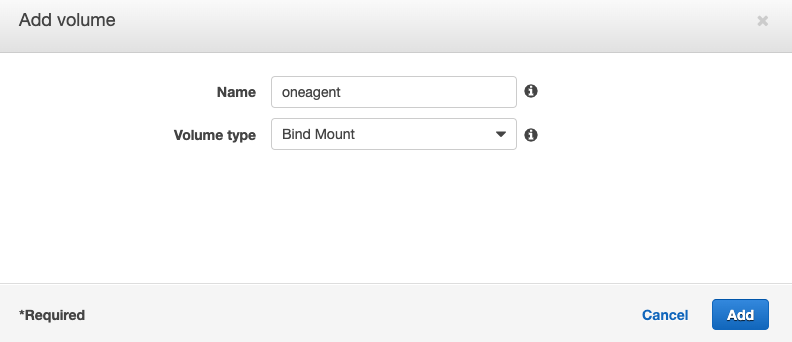
Scroll down to the “Volumes” section and add a volume. This volume is used to store monitoring libraries which will be loaded after by the application container.
- Name:
Oneagent - Volume type:
Bind Mount
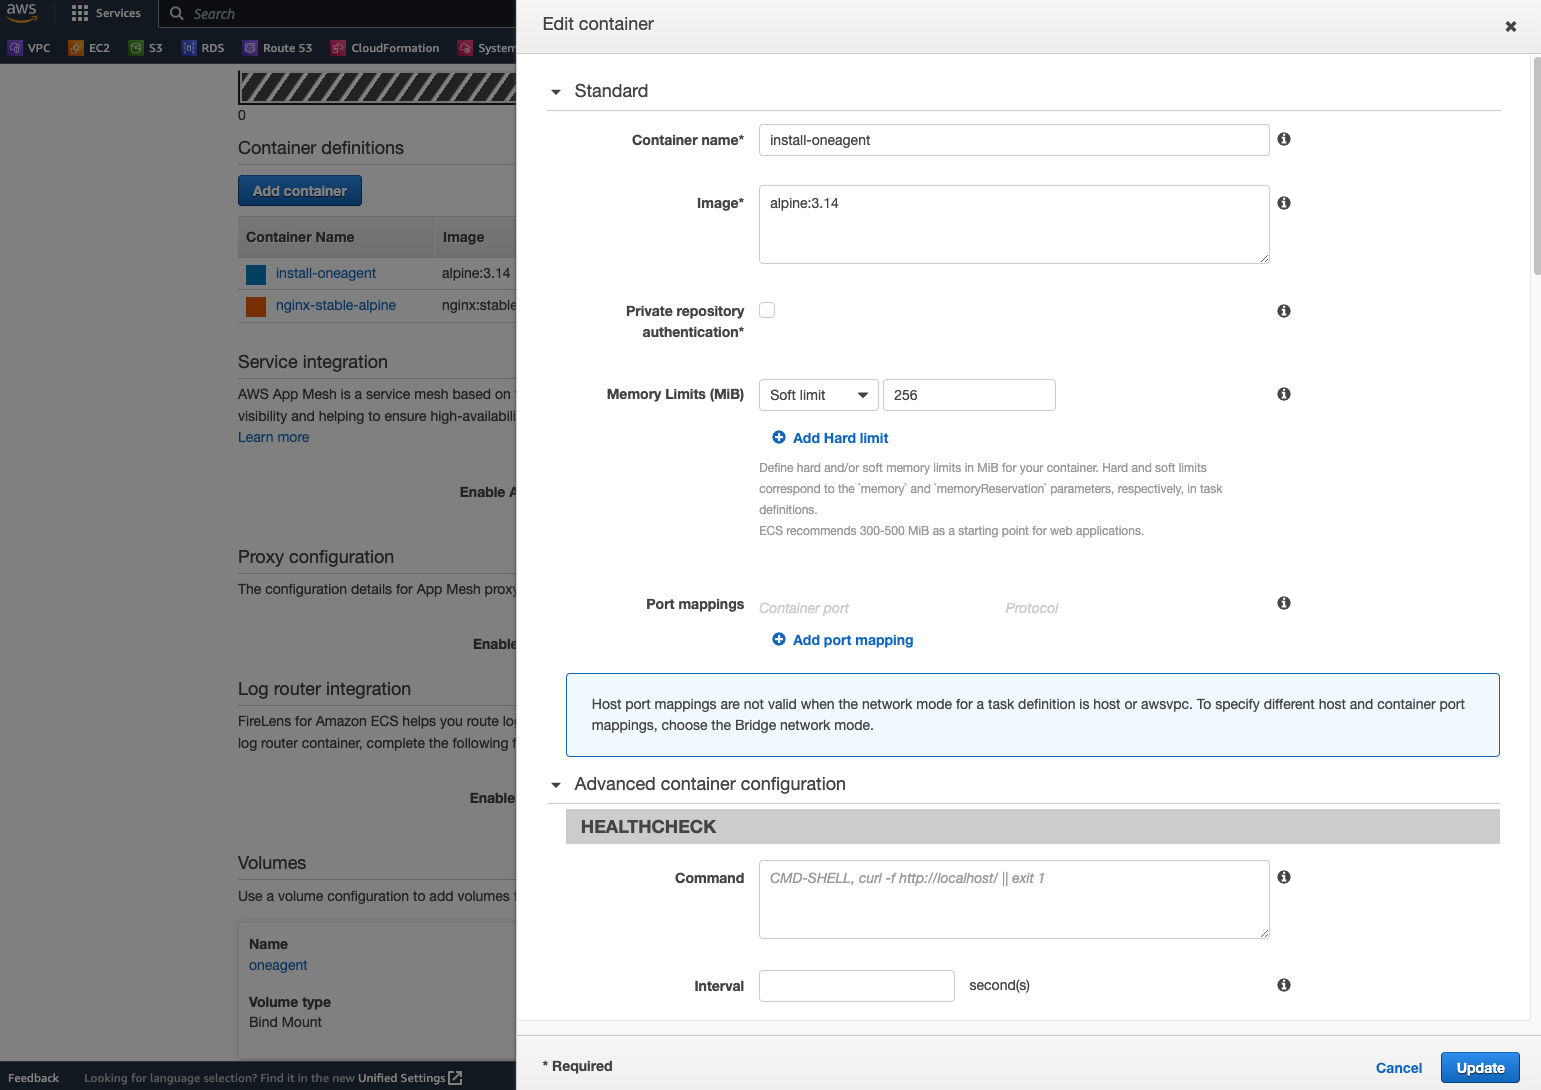
Scroll up and click on “Add container” and define the first container that will install the Dynatrace OneAgent.
- Standard
- Container Name:
install-oneagent - Image URI:
alpine:3.14 - Soft limit:
256 - Remove Port mappings
- Container Name:
- Environment
- Entry point:
/bin/sh,-c - Command:
ARCHIVE=$(mktemp) && wget -O $ARCHIVE "$DT_API_URL/v1/deployment/installer/agent/unix/paas/latest?Api-Token=$DT_PAAS_TOKEN&$DT_ONEAGENT_OPTIONS" && unzip -o -d /opt/dynatrace/oneagent $ARCHIVE && rm -f $ARCHIVE - Environment variables
- DT_PAAS_TOKEN:
dt.TBD.TBD - DT_API_URL:
DT_URL_TBD - DT_ONEAGENT_OPTION:
flavor=musl&include=all
- DT_PAAS_TOKEN:
- Uncheck
Essential
- Entry point:
- Storage and logging
- Mount points:
oneagent - Container path:
/opt/dynatrace/onagent
- Mount points:
Click on “Add container” once again to add our application container.
- Standard
- Container Name:
nginx-stable-alpine - Image URI:
nginx:stable-alpine - Essential container:
Yes - Add port mappings
80 TCP
- Container Name:
- Environment
- Environment variables
LD_PRELOAD: /opt/dynatrace/oneagent/agent/lib64/liboneagentproc.soDT_LOGLEVELCON: info
- check
Essential
- Environment variables
- Startup dependency ordering
- Container name:
Install-oneagent - Condition:
Complete
- Container name:
- Storage and logging
- Mount points:
oneagent - Container path:
/opt/dynatrace/onagent
- Mount points:
Now, you should see 2 containers defined.

Click on “Create”. Once your task definition is created, you can launch your container on your cluster and you should see the container appear in the Dynatrace console.
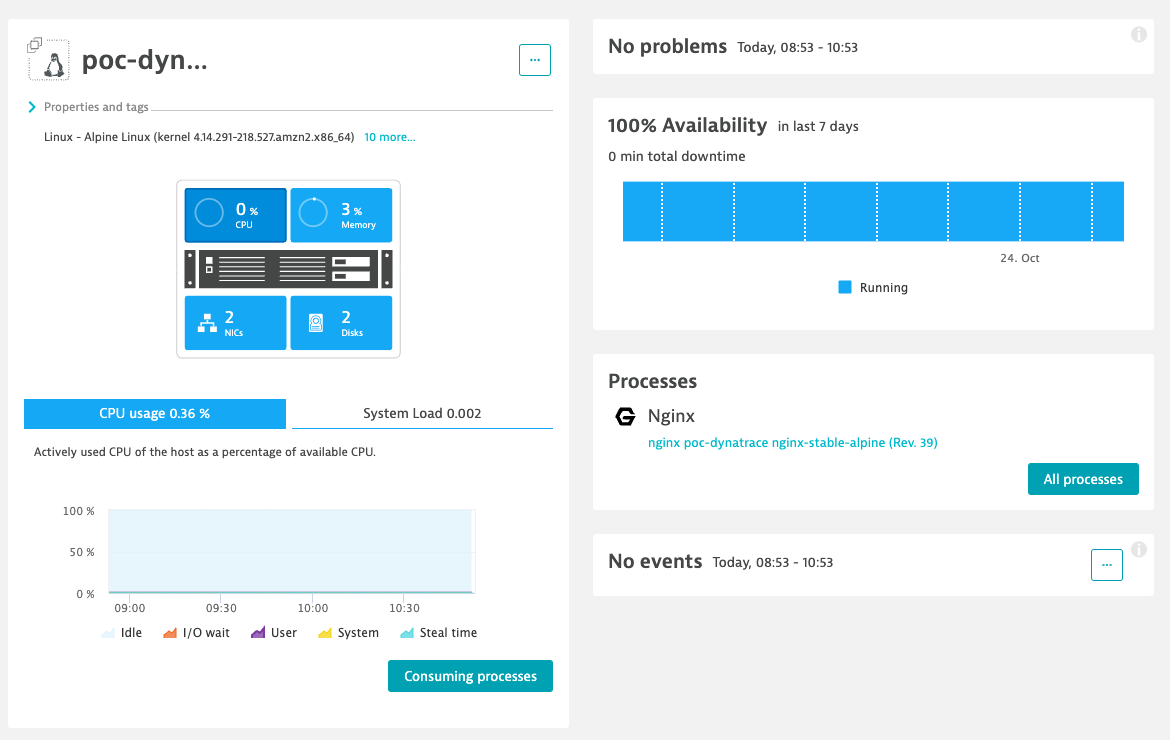
You can get an overview of the list of all built-in metrics available in the Dynatrace console here.
The complete task definition in JSON file format can be found here task_definition.json.
Conclusion
We have seen that the integration with the monitoring platform is easy to set up. The integration with ECS containers is well decoupled from the agent installation. The monitoring agent forwards all metrics to the platform. We also have access to several metrics and information that help the daily monitoring but also the troubleshooting process.
In conclusion, wherever you run your application, there is always a way of monitoring your application. The monitoring is a must-have for all existing and new applications.